April 2012
Get into efficient overdrive cruising over a weekend
Performing an AOD swap in a classic Mustang is easy today thanks to the automotive aftermarket. These companies have done the homework already. All you have to do is tell them what you have and what you need. When the parts arrive on your doorstep, they can be installed in a weekend.
Few companies know more about automatic transmissions than B&M Racing & Performance, which has been building high-performance automatic transmissions for 60 years. Cal Pony Cars was founded by Ray Harrington, a Mustang enthusiast who took his profession and turned it into high quality reproduction parts for classic Mustangs. Ray noticed how much fabrication had to be done to swap an Automatic Overdrive (AOD) transmission into classic Mustangs. That’s when he and his people went to work conceiving an all-in-one kit.
Ray wasn’t the only one with an eye on what enthusiasts needed. Inland Empire Driveline developed custom length steel and aluminum drive shafts for the conversion, available from Mustangs Plus for 8- and 9-inch rear ends. Classic Tube has also developed transmission cooler lines for vintage Mustangs with an AOD conversion.
Follow along here as Gil Roiz at Mustangs Etc. replaces a ‘6S Mustang’s C4 with a B&M AOD.
1. B&M’s ’80-’93 Ford AOD Street/Strip transmission sports 2.40:1 First and 1.47:1 Second gears along with 0.67:1 overdrive. This means you experience a 33 percent reduction in engine rpm in overdrive. Instead of 2,800 rpm at 70 mph, you can expect 2,000 rpm depending upon axle ratio and tire size for greatly improved fuel efficiency and less wear and tear. For under $ 1,800, each professionally rebuilt B&M AOD gets heavy-duty clutches and bands, fresh seals and gaskets, a new roller clutch with improved lubrication, and a rebuilt and calibrated valve body. A torque converter must be ordered separately.
2. Cal Pony Cars offers one-stop shopping with its TRA-650-421 AOD conversion kit for classic Mustangs. The kit includes a transmission mount, a tubular cross member, a slip yoke, an adjustable throttle valve cable for carburetors, a flexplate, and an AOD manual shift linkage. Because the B&M AOD may have a column shift linkage, Cal Pony includes floor shift parts in the kit for a smooth swap.
3. What makes the AOD different than the vintage Mustang’s C4 is the overdrive and torque converter lockup features. The AOD is an advanced version of the old FMX with overdrive and an aluminum case. There are two input shafts-the large shaft for 1-2-3 shifts and the smaller shaft for overdrive.
4. This is the neutral safety and back-up light switch, which gets a multiplex four-pin plug. Because Ford has discontinued this wiring connector, you will have to find it aftermarket. Ron Francis Wiring (www.ronfranciswiring.com; 800/292-1940) sells a new pigtail under PN PG-057 or you can find a used one. Wiring is simple—at the far left and going clockwise the first pair of terminals are neutral safety and the second pair are for backup lights. You can buy the plug or use female bullet terminals to your Mustang’s harness.
5. The C4 is petite compared to the AOD. This means your stock single exhaust system will not clear the AOD. Chances are your stock dual exhaust system H-pipe may not clear either. Be prepared to have a new exhaust system fabricated.
6. Driveshaft removal happens first using a closed end 1/2 -inch wrench to remove the U-bolts.
7. Gil Roiz of Mustangs Etc. uses a spare yoke in the tail shaft to keep fluid from escaping during removal.
8. The C4ís manual shift linkage is disconnected at the shift rod.
9. The speedometer cable is disconnected next. Be prepared to change the speedometer drive gear, especially if you’re doing a rear end gear swap as well. If your Mustang has 2.79:1 or 3.00:1 rear end gears, overdrive will bog down the engine because rpm drops way below the engine’s torque curve. Best axle ratios for the AOD are 3.55:1 (best for cruising), 3.91:1, or 4.11:1.
10. Throttle valve (vacuum modulator) lines need to be disconnected because you’re not going to need vacuum control with the AOD.
11. If you’re converting a ’65-’66, remove the C4’s kick-down linkage. With ’67-up, simply remove the kick down cable.
12. Next, remove the torque converter dust cover using a 1/2 -inch wrench. Torque converter nuts get a 9/16-inch socket. Be prepared to turn the crankshaft at the balancer to access each nut.
13. Small-block Ford V-8s use a two-bolt starter, which must be removed. An 1/2- inch socket gets the bottom bolt. For the top bolt and cable connection, you will need a 1/2-inch combination wrench.
14. The factory cross member and mount are removed next using a 9/16-inch wrench and socket. You will need an 11/16-inch socket for the mount nuts. The parking brake mechanism and cables can also be disconnected at this time.
15. Gil goes after six bellhousing bolts with a 5/8 -inch socket and long extension. If you have a ’64 1/2 Mustang with a five-bolt bell, you cannot do this swap.
16. Here, Gil has disconnected the neutral safety and back-up light switch and is removing the C4. The larger AOD will never clear this Y-pipe.
17. The C4 flexplate and separator plate will not work with the AOD transmission. You’re going to need an AOD separator plate and dust cover, which are available from Mustangs Etc.
18. Chances are good that your B&M AOD will need a shifter lever swap from column shift to floor shift. Cal Pony Car includes everything you’ll need for this swap. Begin by removing the AOD’s pan.
19. On the left is B&M’s manual shift lever. On the right is the dogleg type for Mustangs with a floor shift, which comes in the Cal Pony Car kit. Follow the instructions and take pictures before disassembly.
20. Remove the 1/8-inch diameter roll pin, which retains the manual shift lever, using a pair of diagonal cutting pliers. Then remove the shaft nut with a 14mm open-end wrench. The shift lever should slide right out. Take care not to damage the seal. And use plenty of lubrication during installation.
21. Once installed, the dogleg shift lever should look like this. The inner shaft is for the throttle valve lever and cable.
22. The aluminum separator plate is installed like this. It encloses the bellhousing and keeps engine heat away from the torque converter.
23. The flexplate is a special part from Cal Pony Cars. If you have a ’65-’81 289/302 V-8, you want a 28-ounce offset balance flexplate. If you have a ’82-up 5.0L engine, you must go with a 50-ounce offset balance flexplate. Specify what you have when ordering. Here, Gil marks the flexplate and reinforcement ring for easy reference during installation.
24. After using a thread locker, Gil torques the flexplate to crank bolts to 75-85 ft/lbs in one-third values in a criss-cross pattern for uniformity. Then he rechecks the torque.
25. Before torque converter installation, add at least one quart of Dexron lll or Mercon V fluid to the torque converter. Both types are AOD compatible. This ensures a good pump prime and plenty of lubrication on start-up. We stress the importance of proper torque converter seating, which is very tricky on an AOD. Feel for the converter to seat twice on two shafts and the pump stator. If you can fit your hand between the converter and pump, it is not seated. If it’s not seated, you will damage the pump, converter, and input shafts.
26. Because the AOD has thicker bellhousing bosses, you’re going to need longer bolts-some two-inches in length. You will need six of them -Grade 5 or Grade 8.
27. Gil raises our B&M AOD into place, which isn’t always easy depending on your exhaust system.
28. The torque converter studs must be lined up properly with the flexplate holes. If there’s a torque converter drain plug, it must pass through the flexplate. If it is wedged between the converter and flexplate, it will warp the flexplate and cause a vibration. Torque converter retaining nuts (four) get 25- 30 ft/lbs of torque each.
29. Cal Pony Cars’ crossmember is a perfect fit.
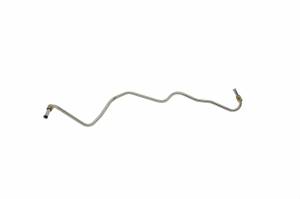
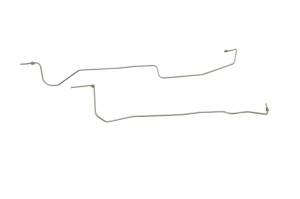
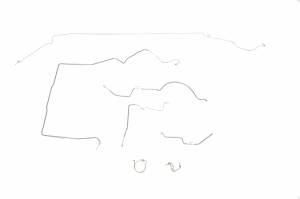
30. Inland Empire Driveline provided us with this steel AOD conversion driveshaft from Mustangs Plus. The main thing you need to think about is rear end size – 8- or 9-inch, which affects driveshaft length. Classic Tube has set us up with custom bent AOD transmission lines for a ’65 Mustang (also available for ’66 and ’67-’70). Line clips are also provided with this kit.
31. Gil installs our dynamically-balanced steel driveshaft. The best rule of thumb for U-bolts is to tighten them so the universal joint caps are seated firmly, but not overtightened. If you overtighten, bearing caps may fail.
32. This is how the Cal Pony Cars’ manual shift linkage should look. Also shown here is the throttle valve linkage, which modulates control pressure based on throttle position. To get started, you want the TV cable straight and firm, but without tension. This is your starting point prior to a test drive and real street adjustment.
33. Don’t forget this plug, which is the main pressure line tap where you measure control pressure.
34. Classic Tube transmission cooler lines clear the starter and bellhousing nicely and are easy to access. Gil went with a rebuilt Autolite starter from CAE Starters & Alternators, available from Mustangs Etc.
Throttle Valve Cable Adjustment
There has long been a lot of confusion about the AOD’s TV (throttle valve) cable adjustment. Ford advises the use of a pressure gauge, which most novices don’t have nor do they know how to use. We will caution you that TV cable adjustment is something you must get right or risk serious transmission damage.
First, some history about Mustang transmission operation. Your Mustang’s original C4 transmission has two shift control systems-the vacuum modulator (throttle valve) and a kick-down system. The AOD has one cable-controlled system. C4 shift points are controlled by a combination of intake manifold vacuum and kick-down lever position. In normal driving, the kick-down cable is not involved. However, the throttle valve is always working via manifold vacuum, which depends on how much throttle you’re using. With light throttle and high intake manifold vacuum, control pressure is low and you get smooth shifts up or down.
As you step on the gas, intake vacuum drops and control pressure increases to both delay and firm the upshift. You want a firm upshift at open throttle for a solid transfer of power and minimal clutch and band slippage. Punch the throttle wide open and the kick-down cable contributes to even higher control pressure and the appropriate downshift to Second or First gear for that burst of power. You don’t want low control pressure at wide-open throttle, which will cause slippage, extreme heat, and serious damage.
The AOD does not have a vacuum modulator, but instead a throttle valve cable that does the work of both a vacuum modulator and a kick-down linkage. Instead of getting a vacuum signal as an indication of throttle position like we see with the older C4, C6, and FMX transmissions, the AOD’s TV cable yields actual throttle position via a direct mechanical cable connection.
Control pressure is modulated by how far the throttle valve cable is moved. The more you step on the gas, the higher control pressure becomes to both delay upshift and increase control pressure for firmness. Transmission professionals we’ve spoken with suggest you adjust the cable with the throttle closed (idle) and no cable slack, but no cable tension either. Then take your Mustang for a road test at light throttle. If the AOD upshifts too soon under mild acceleration with quick 1-2-3 upshifts (overdrive doesn’t come in until roughly 40 mph), you don’t have enough cable tension (too little control pressure). Gradually increase cable tension until you get evenly spaced firm shifts under mild acceleration. Do not go into wide-open throttle until you are certain you’re getting firm upshifts without slippage. Slippage will cost transmission life. It’s a good idea to have a transmission shop double-check your adjustment with a pressure gauge.